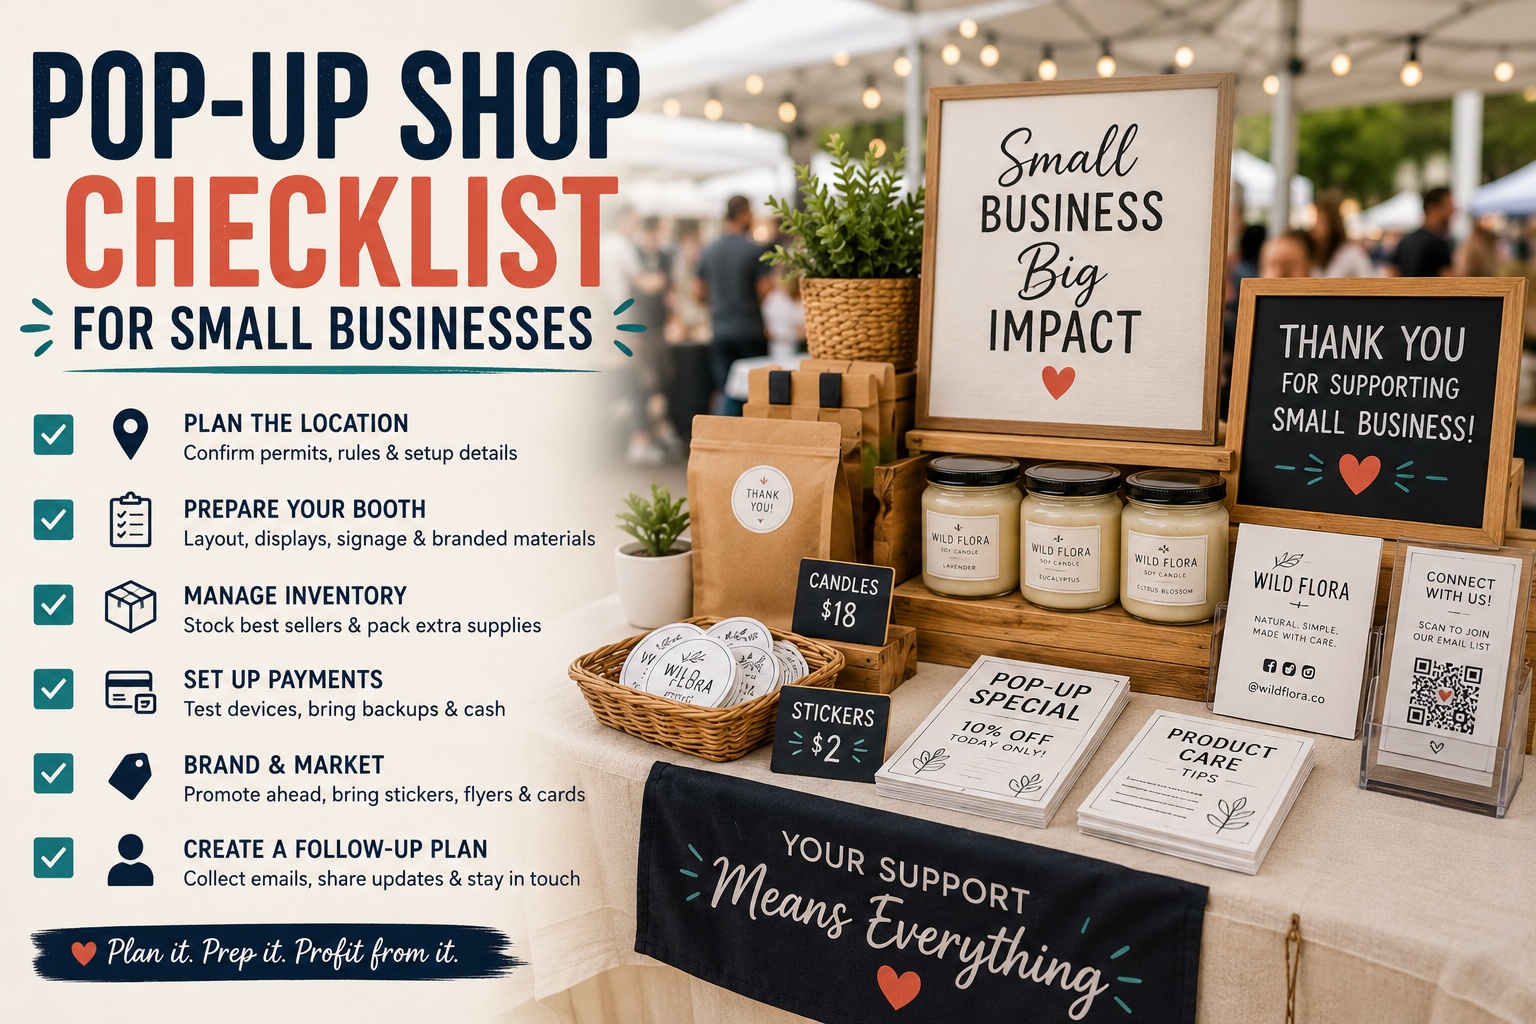
Pop-Up Shop Checklist for Small Businesses
TLDR
A good pop-up shop checklist helps you plan the event, sell smoothly, and avoid the small problems that can throw off the day.
Before your pop-up, confirm the location, permits, payment setup, display materials, inventory, signage, packaging, and staffing. Bring more supplies than you think you need, make your booth easy to understand from a few feet away, and give customers a simple way to remember your brand after they leave.
Introduction
A pop-up shop can look simple from the outside: table, products, card reader, maybe a nice sign. Then the day arrives and you realize you forgot tape, your QR code is too small, the tablecloth is wrinkled, the price tags are unclear, and your best-selling item is still sitting in a box under the table.
That is why a pop-up shop checklist for small businesses is worth making before the event. Pop-ups move fast. Customers walk by quickly. You may have only a few seconds to show what you sell, why it matters, and how they can buy it.
The good news is that a pop-up does not need to be complicated to work well. It needs to be planned. A clean booth, clear pricing, easy checkout, strong product display, and a few branded print materials can make a small business look organized and trustworthy, even if it is the first event.
This guide walks through the main things to prepare before, during, and after your pop-up shop.
Start With the Goal of the Pop-Up
Before you order supplies or design signage, decide what the pop-up is supposed to do.
Not every pop-up has the same goal. Some are meant to make direct sales. Some are for brand awareness. Some are for testing a new product. Some are for building an email list, meeting local customers, or creating content for future marketing.
Common pop-up goals include:
- Selling inventory
- Testing a new product line
- Introducing your brand locally
- Collecting emails or SMS signups
- Meeting wholesale buyers
- Booking consultations
- Promoting a grand opening
- Building social media content
- Getting customer feedback
Your goal affects the whole setup. If sales are the main goal, your display, pricing, and checkout process matter most. If brand awareness is the goal, signage, samples, flyers, and giveaways may matter more. If you are testing products, you need a simple way to track what people notice, touch, ask about, and buy.
A pop-up is not just a table. It is a live test of your brand in front of real people.
Confirm the Location, Rules, and Permits
This is the less exciting part, but it matters.
Before the event, confirm what the venue or organizer provides and what you are responsible for bringing. Ask about table size, chairs, electricity, Wi-Fi, parking, unloading, setup time, teardown time, lighting, weather plans, and any display restrictions.
For some pop-ups, especially markets and temporary retail events, you may also need permits, licenses, insurance, or sales tax registration. Requirements vary by location and business type, so check with the event organizer and local authorities before you show up.
Ask these questions early:
- What time can vendors load in?
- Where do vendors park?
- Is electricity included?
- Is Wi-Fi reliable?
- Are tents, weights, or table coverings required?
- Are there rules for signage?
- Do I need a seller’s permit or temporary business license?
- Do food, skincare, candles, or other regulated products need extra labeling or approval?
- What happens if weather affects the event?
- Who do I contact on event day?
Print or save copies of important confirmations. That includes your vendor approval, payment receipt, insurance certificate if needed, permit documents, and event contact information.
Plan Your Booth Layout Before the Event
Do not wait until setup time to figure out the table.
Sketch your booth at home. It does not need to be fancy. Just decide where the best products go, where checkout happens, where bags and packaging sit, and where your signage will be visible.
The goal is to make your booth easy to understand quickly. Someone walking by should be able to tell what you sell without asking.
A strong booth layout usually has:
- A clear focal point
- Products at different heights
- Easy-to-read pricing
- A clean checkout area
- Branded signage
- Samples or testers if relevant
- A simple path for customers to browse
- Backup inventory hidden neatly
Height helps a lot. Flat tables can look cluttered fast. Use small risers, crates, shelves, stands, or display trays to create levels. Put your best or most recognizable products at eye level when possible.
Also think about distance. A tiny logo on a business card may look nice up close, but it will not help someone notice your booth from across the room. Use larger signs for attention and smaller printed pieces for details.
Bring the Right Branded Print Materials
Print materials help customers understand, remember, and trust your business. They also make your pop-up feel more polished.
You do not need everything. You need the pieces that support how people will shop.
A strong pop-up print kit may include:
- Business cards
- Logo stickers
- Product labels
- Price tags
- Flyers
- Thank-you cards
- QR code cards
- Packaging stickers
- Care instruction cards
- Small signs
- Loyalty cards
- Branded apparel
For example, a candle brand may need scent labels, warning labels, care cards, and logo stickers. A jewelry brand may need earring cards, business cards, and small packaging seals. A bakery may need ingredient labels, menu flyers, and branded packaging stickers.
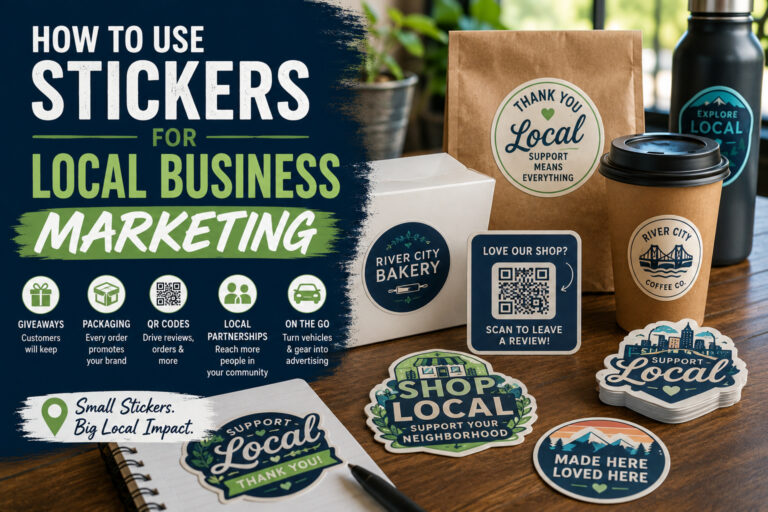
Custom stickers are especially useful because they can do several jobs at once. You can use them as packaging seals, customer freebies, shopping bag labels, product branding, or event giveaways. For a simple branded booth upgrade, order custom stickers for packaging and events before your next pop-up.
For products sold in jars, bottles, boxes, or bags, roll labels can make the setup look more consistent. They are also easier to apply in batches before the event. If your products need clear branding or variant names, custom label rolls are a practical option.
And do not forget basic handouts. If customers often ask what you do, where to buy, or when your next event is, a flyer can answer that after they leave. You can print small business flyers for menus, service lists, product launches, seasonal offers, or event promotions.
Make Pricing Clear
Unclear pricing slows everything down.
Some customers will ask. Others will walk away because they do not want to ask. Make prices easy to see, especially if your booth gets busy.
You can price items in several ways:
- Individual price tags
- Shelf signs
- Tabletop signs
- Menu-style price boards
- Product category signs
- Bundle signs
- QR code price list
Bundles are helpful at pop-ups because they make decisions easier. Instead of asking customers to choose one small item, you can offer a simple deal like “3 for $15” or “Buy 2, get 1 half off.” Keep the math easy. You do not want to calculate complex discounts while several people are waiting.
If you sell products with different sizes, scents, flavors, or finishes, make the differences clear. Confusion creates friction, and friction costs sales.
Prepare Inventory Like a Retailer
Inventory planning is part art, part guesswork. The right amount depends on the event size, expected foot traffic, price point, season, weather, and how well your audience matches the crowd.
Start with your best sellers. Then add a few attention-grabbing products that make people stop. A pop-up is not always the best place to show every item you make. Too many choices can overwhelm shoppers.
Before the event, create a basic inventory list with:
- Product name
- Quantity packed
- Price
- Cost if you track margin
- Quantity sold
- Notes
You can use a spreadsheet, notebook, POS system, or printed checklist. What matters is that you can see what sold and what did not.
Pack extra inventory underneath the table or behind the display, but do not overfill the customer-facing area. A full booth looks good. A crowded booth can feel messy.
Set Up an Easy Checkout Process
Checkout should be fast.
Test your card reader before the event. Charge your phone or tablet. Bring backup power. Make sure your payment app is updated. Confirm that your tax settings are correct if you collect sales tax through your POS.
Bring more payment tools than you think you need:
- Card reader
- Backup card reader if available
- Phone or tablet
- Portable charger
- Charging cables
- Cash box
- Small bills
- Receipt paper if needed
- QR code for digital payment
- Order forms if you take custom requests
Also decide how you will handle bags, receipts, and packaging. If someone buys three items, can you pack the order neatly and quickly? If someone asks for a gift receipt, do you have a plan? If someone wants a custom order, do you have a form or QR code ready?
Small details matter more when a line forms.
Pack a Pop-Up Emergency Kit
Every pop-up vendor eventually learns the same lesson: bring tape.
Bring a small emergency kit with the unglamorous items that save the day.
Useful supplies include:
- Tape
- Scissors
- Pens
- Markers
- Safety pins
- Zip ties
- Clips
- Rubber bands
- Small tools
- Extension cord
- Power strip
- Portable charger
- Cleaning cloth
- Paper towels
- Trash bags
- Hand sanitizer
- Extra price tags
- Extra labels
- Binder clips
- Tablecloth clips
- Breath mints
- Water
- Snacks
For outdoor events, add tent weights, sunscreen, weather covers, clips, and backup signage. Wind is not your friend. Neither is a paper sign taped loosely to a table.
Dress the Brand, Not Just the Booth
Your booth is part of the brand, but so are the people working it.
You do not need a formal uniform, but you should look intentional. A branded shirt, apron, hat, tote, or name tag helps customers know who to talk to. It also makes photos from the event look more professional.
For small teams, custom apparel can be simple. A clean logo shirt is enough. If you want shirts, totes, or staff apparel for events, custom DTF transfers can help you create branded pieces without building a full merch inventory first.
Also prepare a short explanation of your business. Not a stiff pitch. Just a clear sentence.
For example:
“We make small-batch candles inspired by desert landscapes.”
“We sell waterproof stickers and art prints for hikers, climbers, and outdoor people.”
“We make handmade dog treats with simple ingredients.”
This helps you answer the “What is this?” question without rambling.
Promote the Pop-Up Before You Go
Do not rely only on event traffic.
Promote the pop-up ahead of time through your email list, social media, website, local groups, retail partners, and customer orders. If you ship products before the event, include a small insert or sticker with the pop-up date.
Share the basics clearly:
- Event name
- Date
- Time
- Address
- Booth number if assigned
- What you are bringing
- Any event-only items
- Any limited offers
- Parking or entry details if helpful
Post more than once. People miss things. A good rhythm is one announcement post, one reminder post, one behind-the-scenes post, and one day-of post.
If you are bringing a limited product, show it. If you are doing a giveaway, explain it. If your booth has a special offer, keep the wording simple.
Create a Reason to Follow Up
A pop-up should not end when the customer walks away.
Give customers a way to stay connected. That could be a QR code for your email list, a discount card for their next order, a branded sticker, a flyer with your online shop, or a business card with your social handle.
Good follow-up tools include:
- Email signup QR code
- Reorder card
- Loyalty card
- Review request card
- Social media card
- Event calendar flyer
- Sticker giveaway
- Referral card
Keep the offer clear. “Join our email list for 10% off your first online order” is easier to understand than “Stay connected for updates, deals, announcements, and more.”
After the pop-up, send a thank-you message if you collected emails. Share photos. Announce what sold out. Restock popular items. Follow up with custom order inquiries quickly.
The follow-up is where one event can turn into repeat customers.
Day-Before Pop-Up Shop Checklist
Use this the day before the event.
- Confirm event time and location
- Confirm booth number or vendor spot
- Pack inventory
- Count and record inventory
- Charge card reader, phone, and tablet
- Pack portable chargers
- Test payment system
- Print or pack permits and confirmations
- Pack tablecloth, displays, risers, and signage
- Pack stickers, labels, flyers, and business cards
- Prepare bags, tissue, boxes, or packaging
- Label products clearly
- Prepare price signs
- Pack emergency kit
- Pack food and water
- Check weather
- Plan route and parking
- Set an alarm for setup time
Event-Day Pop-Up Shop Checklist
Use this during setup and sales.
- Arrive early
- Check in with organizer
- Set up table, tent, or booth
- Secure outdoor displays
- Place best products at eye level
- Set up signage
- Make prices visible
- Test checkout again
- Keep packaging within reach
- Keep extra inventory hidden but accessible
- Take photos before customers arrive
- Greet people without hovering
- Track sales and notes
- Restock display throughout the event
- Keep booth clean
- Collect emails or follows
- Save customer questions for later content ideas
After the Pop-Up Checklist
The event is not over when the booth comes down.
- Count remaining inventory
- Compare sales to inventory packed
- Review best sellers
- Note products people asked about
- Record customer feedback
- Follow up on custom orders
- Send thank-you emails if appropriate
- Post event photos
- Update your website or shop inventory
- Reorder stickers, labels, flyers, or packaging if needed
- Decide what to change before the next pop-up
This is where you learn. Maybe your sign was too small. Maybe people loved one product but ignored another. Maybe your pricing was confusing. Maybe your packaging took too long. Write it down while it is fresh.
Your second pop-up should be better than your first.
Common Pop-Up Shop Mistakes to Avoid
The biggest mistake is trying to bring everything. A focused booth is easier to shop than a crowded one.
Another mistake is making the brand hard to identify. Your business name should be visible. Your product categories should be clear. Your packaging should look like it belongs with the booth.
Avoid these common problems:
- Too many products on the table
- No visible prices
- Weak signage
- Poor lighting
- Dead phone or card reader
- No backup payment method
- No way for customers to follow up
- Messy packaging area
- No bags or receipt option
- Tiny QR codes
- No event-day photos
- Forgetting to track what sold
A good pop-up does not need to be perfect. It just needs to be easy to shop.
Conclusion
A pop-up shop gives a small business a rare chance to meet customers in real life. That makes planning important. Your booth, products, pricing, checkout, signage, packaging, and follow-up all shape how people experience the brand.
Use this pop-up shop checklist for small businesses as a starting point, then adjust it after each event. Bring the essentials. Make your booth easy to understand. Use print materials that help customers remember you. And keep notes, because every pop-up teaches you something.
A clean setup, clear message, and simple follow-up plan can turn one temporary booth into lasting customers.