
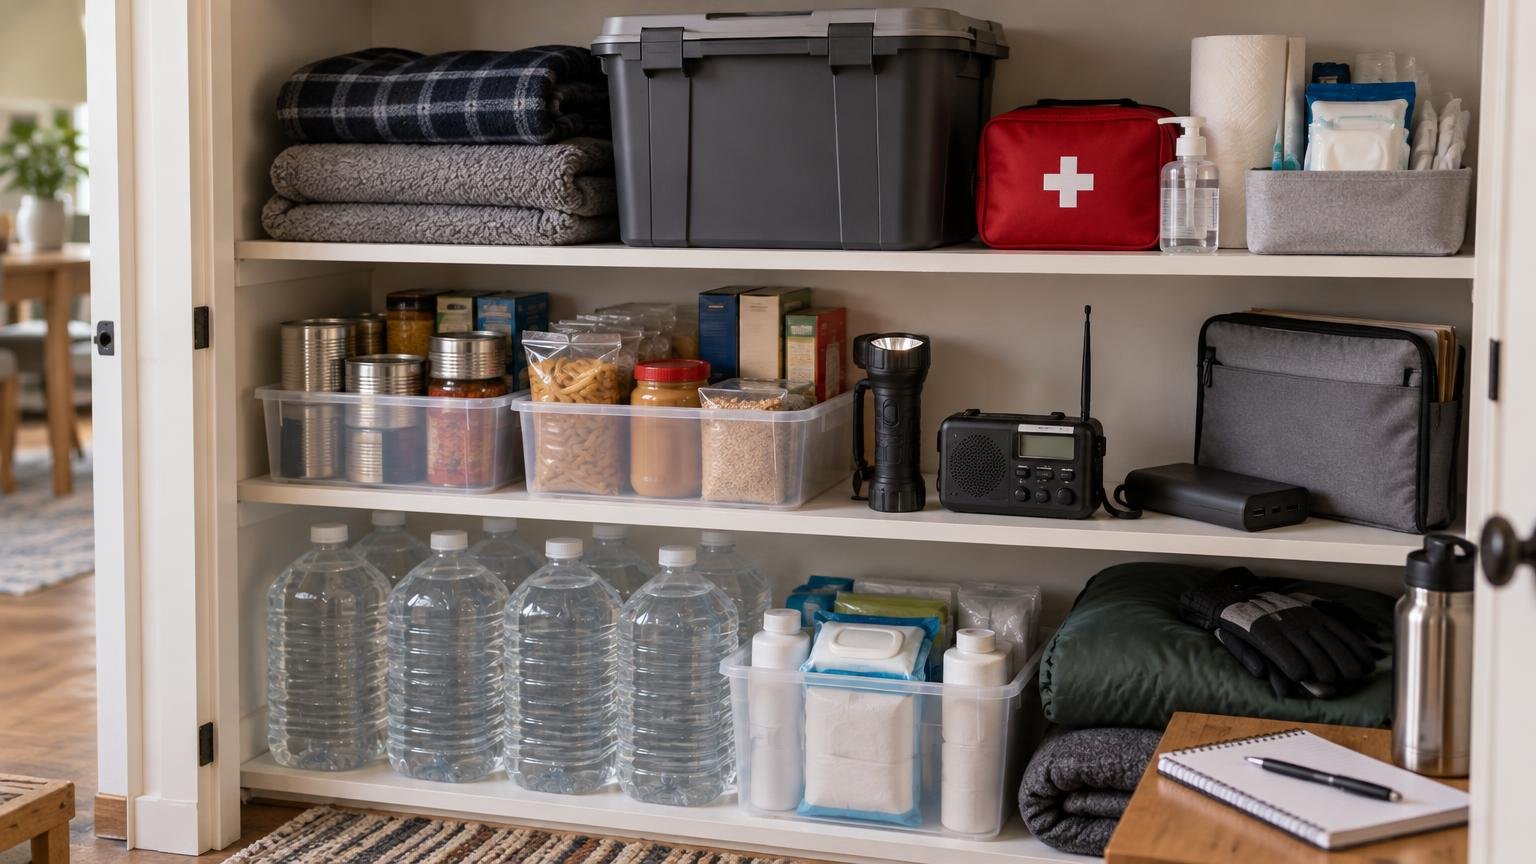
How to Build a Home Emergency Supply Closet
TLDR: Build your home emergency supply closet around the problems a disruption may create: no safe tap water, limited food access, darkness, lost communications, sanitation trouble, uncomfortable temperatures, and a possible need to leave quickly. Keep frequently needed equipment near the front, bulk supplies lower down, documents in a portable waterproof pouch, and hazard-specific items in a marked tote. Maintain separate evacuation bags, because a fixed closet cannot leave with you.
A home emergency supply closet is a fixed, organized base for sheltering at home during a power outage, severe storm, water-service interruption, or similar disruption. It should make important supplies easy to find in the dark without turning one closet into an unmanageable pile of survival gear.
The most useful setup is organized by function and access speed rather than by product type alone. Water and bulk food may occupy the lower shelves, while flashlights, radios, first aid supplies, and documents need to remain immediately reachable. The closet supports your household plan; it does not replace planning, safe shelter, or an evacuation kit.
Choose the right location for your home emergency supply closet
Choose a dry, accessible space that every capable household member can find. A hall closet, pantry section, utility-room cabinet, or sturdy freestanding shelving unit may work. Avoid locations exposed to routine moisture, extreme heat, direct sunlight, fuels, pesticides, or household chemicals. Water is heavy, so place it low on stable shelving rather than above head height.
Do not put every supply in a place threatened by your most likely local hazard. A basement may be convenient but vulnerable to flooding. A garage may become excessively hot or cold. An upstairs closet may be difficult to reach for someone with limited mobility. If one perfect location does not exist, use a primary closet plus a small secondary cache in another safe, accessible area.
A storage closet is also not automatically a storm shelter. During a tornado warning, the National Weather Service advises using a basement, safe room, or interior room away from windows; a mobile home is not an appropriate tornado shelter. FEMA guidance likewise distinguishes a purpose-built safe room from an ordinary household space. Identify the correct shelter location for your home separately, then decide whether a small set of critical supplies should also be stored there.
Build a functional baseline before adding specialty gear
Start with supplies that address common household failures. Ready.gov preparedness materials include water, nonperishable food, sanitation items, first aid, lighting, a radio, basic tools, local maps, and protected important documents among the core categories. The Red Cross distinguishes a portable three-day evacuation supply from a larger two-week home supply and recommends adjusting supplies for the household and season.
You do not need to buy everything in one trip. If the cost is a barrier, use a staged month-by-month emergency kit plan. Establish water, lighting, alerts, essential health supplies, and a way to open and eat stored food first. Expand quantities and household-specific equipment after that baseline works.
| Closet zone | Purpose | Access priority |
|---|---|---|
| Water | Drinking and basic household needs | Low shelves; easy to inspect and lift |
| Food and meal access | Shelf-stable meals that require little preparation | Front-facing labels; group by meal |
| Light, power, and alerts | See, charge priority devices, and receive warnings | Immediately reachable |
| Health and sanitation | First aid, hygiene, waste management, and personal needs | Clearly separated and labeled |
| Documents and communication | Contacts, plans, records, maps, and instructions | Portable waterproof pouch |
| Temperature and comfort | Warmth, cooling support, and outage food monitoring | Seasonal items near the front |
| Hazard add-on | Locally relevant protective supplies | One marked, portable tote |
Zone 1: Store and rotate emergency water
Water deserves its own calculation rather than a few forgotten bottles. The CDC advises storing at least one gallon per person per day for at least three days and, if possible, building toward a two-week supply. A four-person household therefore has a three-day drinking-and-sanitation baseline of 12 gallons. Pets, hot conditions, illness, pregnancy, and individual medical needs may increase what the household requires.
Use commercially bottled water or clean containers suitable for water storage. Label self-filled containers with the fill date, protect them from sunlight, heat, and chemicals, and replace the water every six months under CDC guidance. The CDC’s emergency water storage guidance explains container selection and safe storage in more detail. For practical choices based on filled weight and dispensing, see the guide to containers for storing emergency water at home.
Do not make every container too heavy for the people who may need to move it. Several manageable containers can be more useful than one large vessel. Keep at least one container accessible without shifting boxes, and avoid storing water where a leak could destroy documents, food, or electronics.
Zone 2: Organize food around usable meals
Store familiar shelf-stable foods your household can safely eat, not an abstract collection of long-life products. Favor meals that require little water, fuel, or cleanup. Include a manual can opener, eating utensils, paper goods if useful, and feeding supplies for infants or pets. Write expiration or best-quality dates where they are visible, then rotate foods into normal meals before replacing them.
Group food by complete meal or by day. That makes it easier to judge whether the closet contains balanced, usable combinations instead of many cans that do not work together. Dietary restrictions, allergies, texture needs, and preparation requirements should shape the selection; households managing those constraints can use this emergency food plan for allergies and special diets.
Keep some portable food and water in evacuation bags rather than concentrating everything in the closet. A broader 72-hour emergency kit checklist can help separate what should travel from what can remain at home.
Zone 3: Make lighting, charging, and alerts reachable
The equipment needed during the first minute of an outage belongs near the closet door: flashlights or headlamps, spare compatible batteries, a charged power bank, charging cables, and a battery-powered or hand-crank radio. Avoid burying these behind bulk food. A small flashlight stored outside the closet can also help you reach the main supplies safely.
CDC power-preparedness guidance recommends emergency lighting, extra batteries, power banks or car chargers, a battery- or hand-crank NOAA Weather Radio, battery-backed smoke and carbon-monoxide alarms, and appliance thermometers. NOAA Weather Radio All Hazards carries continuous National Weather Service forecasts, watches, warnings, and other emergency information, but you need a receiver capable of receiving those broadcasts. Test reception where you live before relying on it.
Label chargers by device and decide which phones or medical devices receive limited power first. Store power banks within their specified temperature range, recharge them on a recurring schedule, and use a written emergency phone charging plan to allocate capacity during a multi-day outage.
Zone 4: Prepare for health and sanitation needs
Use separate bins for first aid and sanitation so a leaking cleaning product cannot contaminate medical supplies. A practical sanitation bin can include soap, hand sanitizer, toilet paper, menstrual products, diapers if needed, heavy-duty trash bags, ties, disinfecting supplies, and disposable gloves appropriate to routine cleanup. Add household-specific items such as spare eyeglasses, hearing-aid batteries, mobility-device accessories, or communication aids.
Prescription medicines and powered medical equipment require individualized planning. Storage temperature, refill timing, battery compatibility, and safe backup operation vary. Ask the prescribing clinician, pharmacist, or equipment provider what can be stored, how it should be rotated, and what to do during an extended outage. Keep a written equipment and medication list in the document pouch, but do not store temperature-sensitive medicine in an unsuitable closet merely for convenience.
Zone 5: Protect documents and communication information
Keep copies of essential information in a waterproof, portable pouch that can be removed quickly. Useful contents include household contact details, an out-of-area contact, insurance information, identification copies where appropriate, medication and allergy lists, pet records, utility contact numbers, local maps, and a written household communication plan.
Protect sensitive records rather than leaving them openly visible. Use only the copies needed for an emergency, secure digital backups appropriately, and review the pouch whenever an address, policy, medication, school, caregiver, or phone number changes. Include a small amount of cash in practical denominations if that fits your household plan.
Zone 6: Plan for temperature and food safety
Use climate and season to decide what belongs here. Cold-weather supplies may include blankets, warm layers, hats, and gloves. Hot-weather planning may require lightweight clothing, battery-powered fans, sun protection, and extra water, but a dangerously hot or cold home may require relocation rather than more supplies.
Keep appliance thermometers in the refrigerator and freezer instead of leaving them in the closet unused. During an outage, the CDC says an unopened refrigerator generally keeps food cold for about four hours, while a full freezer can maintain temperature for about 48 hours when kept closed. Those are planning benchmarks, not permission to judge food by smell or appearance. A detailed freezer outage preparation plan can help reduce heat gain and support safer decisions.
Zone 7: Add one locally tailored hazard tote
A separate marked tote prevents hazard-specific equipment from overwhelming the core closet. Choose additions based on local emergency-management guidance, your housing type, and realistic evacuation routes. Depending on location, planning may address wildfire smoke, flooding, tornadoes, hurricanes, earthquakes, extreme heat, or winter storms.
- Write the hazard and inspection date on the outside of the tote.
- Store instructions with unfamiliar equipment rather than assuming everyone knows how to use it.
- Keep protective equipment in sizes that fit the intended users.
- Do not store flood supplies only in a flood-prone basement.
- Move time-sensitive seasonal equipment toward the front before the relevant season.
- Review local alerts, shelter guidance, and evacuation zones at least annually.
Pair the supplies with a household plan
A stocked closet cannot decide when to evacuate, identify a safe shelter room, or tell separated family members where to reconnect. Write down how your household receives warnings, who assists children or people with disabilities, who handles pets, which contact lives outside the affected area, and what conditions would prompt you to leave.
Maintain portable evacuation bags separately. Those bags should hold immediately necessary water, food, medicines, documents, communication tools, clothing, and personal supplies that can be carried. The closet can hold greater quantities, heavier water containers, sanitation reserves, household tools, and longer-duration food.
Use a simple maintenance schedule
A closet that is never checked eventually becomes storage rather than preparedness. Put recurring reviews on a household calendar. A brief monthly visual check plus a more complete seasonal review is easier than rebuilding the closet after years of neglect.
- Check for leaks, moisture, pests, damaged packaging, and blocked access.
- Recharge power banks and test flashlights, radios, alarms, and spare batteries.
- Rotate self-filled water on the CDC’s six-month schedule and inspect all containers.
- Move food approaching its date into ordinary meals and replace it.
- Update contacts, insurance information, medication lists, and pet records.
- Adjust clothing, bedding, and hazard totes for the coming season.
- Replace outgrown child supplies and reassess accessibility or medical needs.
- Confirm that every capable household member knows the closet and evacuation-bag locations.
Two safety rules that do not belong in fine print
Never run a generator or another gasoline-powered engine inside a home, garage, or enclosed space. The CDC warns that these devices can create deadly carbon monoxide exposure. Generator selection, outdoor placement, electrical connection, fuel storage, and maintenance require their own safe plan; owning extension cords does not make indoor operation safe.
Second, do not label an ordinary closet as a tornado safe room unless it has been appropriately designed or verified for that purpose. Store supplies where they are useful, but follow official hazard-specific shelter and evacuation instructions when an emergency occurs.
Start with one shelf and make it dependable
Begin by clearing a reachable shelf, adding a flashlight, calculating three days of water, assembling several familiar no-cook meals, and creating a portable contact-and-document pouch. Then add sanitation, charging, alerts, temperature supplies, and a locally relevant hazard tote. A smaller home emergency supply closet that is organized, maintained, and understood by the household is more useful than a larger collection nobody can navigate when the lights go out.
References
- What to do During a Tornado
- FEMA 320: Taking Shelter From the Storm
- Table of Contents
- Emergency Supply Kit Checklist
- How to Create an Emergency Water Supply | Water, Sanitation, and Hygiene (WASH)-related Emergencies and Outbreaks | CDC
- Power Sources | Prepare Your Health | CDC
- NOAA Weather Radio All-Hazards | National Oceanic and Atmospheric Administration
- What to Do to Protect Yourself During a Power Outage | Natural Disasters | CDC
